Table of Contents
Tanaka Contours
Illuminated Contours, often called Tanaka Contours, are a way of representing terrain relief in three dimensions, by applying a light source to contour bands. Originally developed in the late 1800s, they were popularised by Professor Tanaka Kitiro in 1950. Tanaka himself called the technique the “Relief Contour Method” .
There are some fairly complex tutorials for implementing Tanaka contours in QGIS. These usually date from some years ago, and involve coding. With improvements in styling in QGIS in recent years, there are now simpler methods of creating them.
Simplified Version
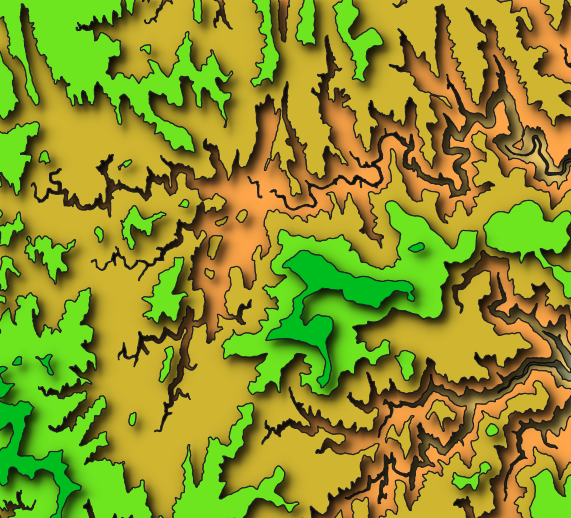
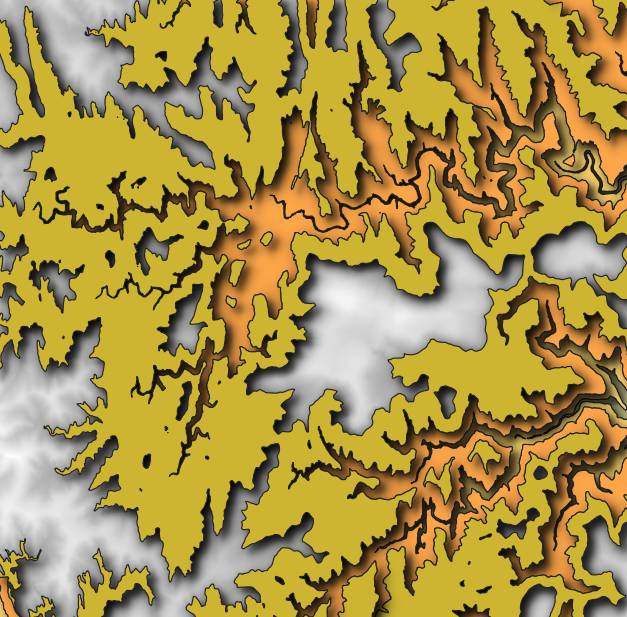
A very simplified version with only drop shadows can be implemented in just a couple of steps from a DEM. This creates very informal map style. The map below is of Mt Wilson in the Blue Mountains, NSW, Australia, using 100m contour bands
- Use Contour Polygons from the Processing Toolbox to create contours for the DEM at appropriate intervals
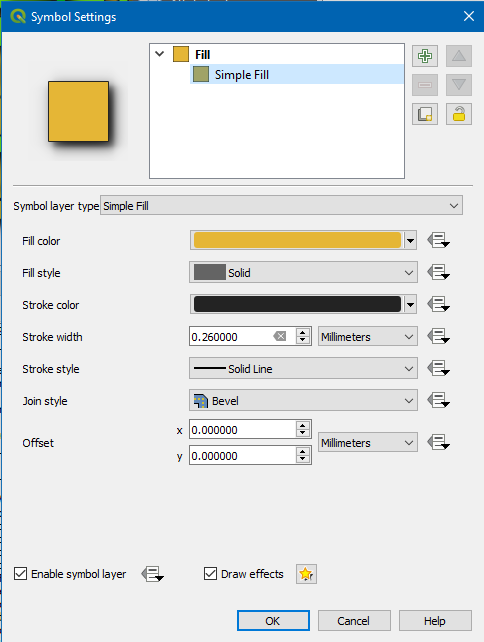
- Style as follows:
- Categorized based on ELEV_MIN
- Use a Color Ramp
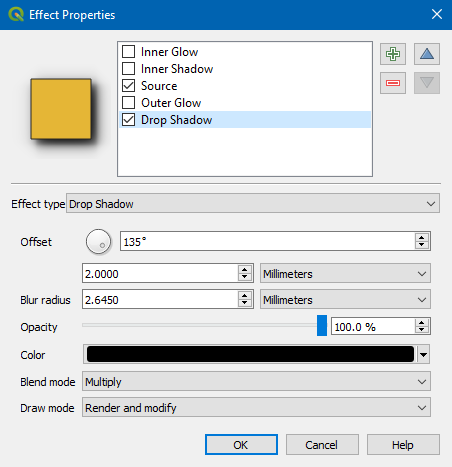
- Click on Symbol to enter the renderer. Drop shadows are added via Draw Effects, at the bottom of the sub renderer (Simple Fill)
- In the main Layer Properties→Symbology tab, open the Layer Rendering at the bottom of the screen and Control Feature Rendering Order (ELEV_MIN, Ascending)
Download the style file for this version - note that the ranges may not be appropriate for your area and may require adjusting.
Standard Version
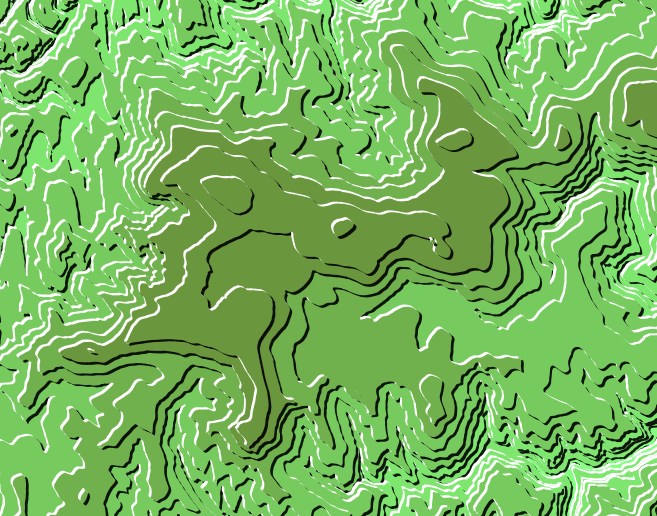
A more typical version requires a few more steps. This styling works, but there probably some improvements that could be made.
The map below is of Mt Wilson in the Blue Mountains, NSW, Australia, using 40m contour bands - the 100m bands used in the example above didn't seem appropriate for this styling.
It's worth noting that the Contour Polygons tool creates non-overlapping polygons. This doesn't seem to affect the styling, but probably could in some instances. There are ways of creating overlapping polygons, but I'm not aware of a way of doing it in a single step.
See below when the top two layers of contours are hidden.
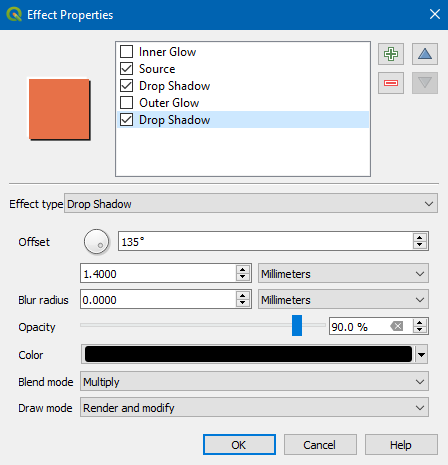
Styling is as follows, similar to the above other than the shadows:
- Graduated on ELEV_MIN
- Use a Color Ramp
- Click on Symbol to enter the renderer.
- In the main sub renderer (click Simple Fill, the color is unimportant), set the Stroke Color to transparent, and the width to 0
- Enter the Draw Effects window, at the bottom of the sub renderer (Simple Fill)
- Set a white Drop Shadow of 0.7mm at -45°, with blend mode Normal -
- Set a black Drop Shadow of 1.4mm at 135°, with blend mode Normal - if this is not larger than the white Drop Shadow, it doesn't seem to appear, so 1.4mm is actually 0.7mm of shadow
- The order of the effects is important (Source, white Drop Shadow, black Drop Shadow)
- In the main Layer Properties→Symbology tab, open the Layer Rendering at the bottom of the screen and Control Feature Rendering Order (ELEV_MIN, Ascending)


Download the style file for this version - note that the ranges may not be appropriate for your area and may require adjusting.
Feedback
Any improvements or suggestions welcome.